
Demand Block
The Demand Block is used to model the arrival of demand events to your process. The easiest way to think of these demand events is to think about customers coming into a bank or a coffee shop: How many customers do you have? How often do they arrive? What is the nature of the variation in the arrivals? The Demand Block can be used to "push" items into or "pull" items from a process.
How It Works
Push Operation When the Demand Block is connected at the beginning (typically the left side of your process), it will be generating new items to push into the model. Specifying "push" means the block will generate new items (Work-in-Process, or WIP) and push those items into your process. As such, the Demand Block almost always will be followed by a Queue Block, which acts as a buffer to absorb incoming items. In a manufacturing model, the items the Demand Block generates may be thought of as parts being released into the production process. The Demand Block generates these parts and forces them into the process. Review the first image for an example of a simple push model.
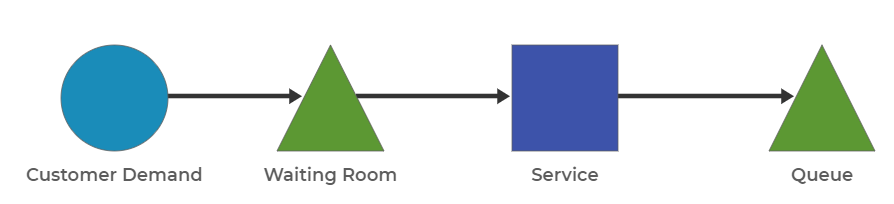
In a push model, the Demand Block is at the beginning of the process.
Pull Operation The next image shows a simple pull model, where the Demand Block is the last block in the process (and typically on the right end of the model).
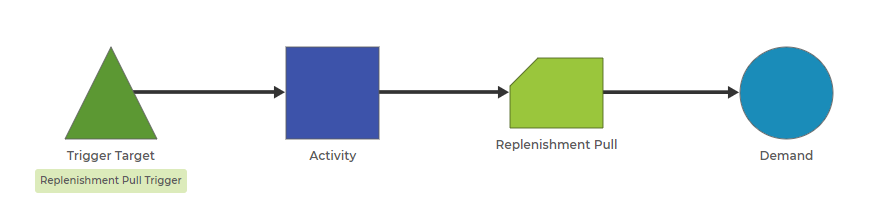
In a pull model, the Demand Block is at the end of the process.
In this mode, the Demand Block does not generate items to enter into the process; instead, it generates a request, or demand, for an item. In this mode, the model must have some other way of generating items in the process. In the case illustrated in the image, the Pull Block is the source of new items in the process. The Demand Block is one of three ways items can be created in your process.
Parameters
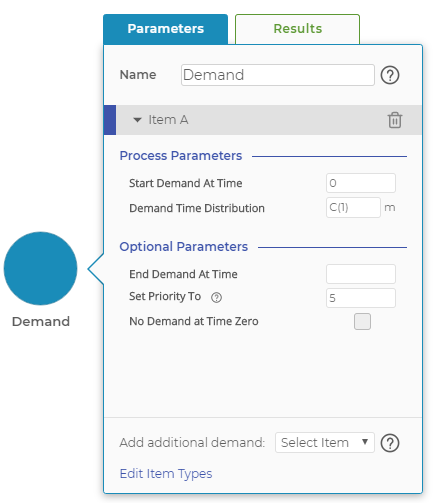
The parameters of the Demand Block.
The Demand Block models the arrival of demand to the process. Demand may represent customers in a service process or parts in a manufacturing process. The Demand Block allows you to set several different parameters, each of which defines the performance of the item in the Demand Block. Those parameters are:
- Start Demand at Time defines when during the simulation run the demand source should begin. The default is time zero, the beginning of the run. In some cases, you may want to start the demand later, in which case you can enter any time less than the total simulation run length.
- Demand Time Distribution defines the mathematical distribution your demand source will follow. This can be a fixed constant or any of a number of distributions (examples: normal, exponential).
- End Demand at Time is an optional parameter that defines when the demand source will stop introducing demand events into the model. The default is blank, which means the demand source will run until the end of the simulation. You can enter any time less than the total simulation run length, but it must be more than the time you enter for the Start Demand at Time parameter.
- Set Priority To is an optional parameter that allows you to set the priority of each created item. The default is 5, with 1 as the highest and 10 the lowest. Learn more about item priorities
- No Demand at Time Zero is an optional parameter that prevents the block from generating a demand event at time zero, the start of the simulation run. This often is helpful when you have multiple demand sources for the same item type that all would create a demand event at time zero, rather than at a random later time as defined by the demand time distribution.
At the bottom of the parameters screen, you'll see the drop-down menu, which will allow you to add multiple item types to the Demand Block or to make duplicates of the same item type as many times as necessary.
Adding multiple unique item types to the Demand Block allows you to model multiple customer types or parts entering the model from a single Demand Block. Adding duplicates of the same item type to the block allows you to use the "Start Demand at Time" and "End Demand at Time" parameters to overlap different demand sources over the simulation run. This is particularly useful when you need to model rush-hour demand at, for example, morning and lunch rush times at a coffee shop. You can have one demand source that represents the normal, baseline demand throughout the day, then add extra demand sources that run for the time periods that represent the two rush periods.
Results
The Demand Block shows only one result: the count of the number of items demanded. At the top of the block, you can find a total count for the block. If you added additional item types, you can expand the section under each item type to see the demand count for each of those specific items.
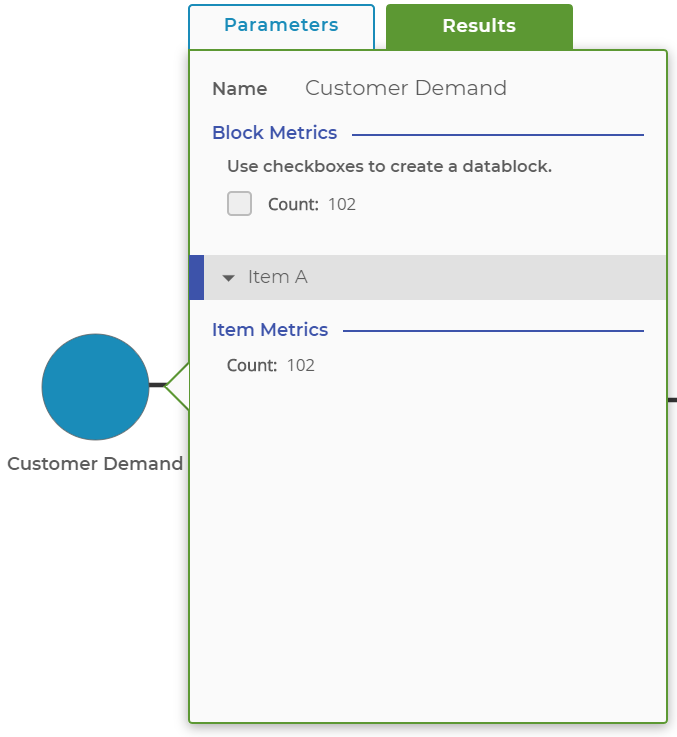
The results of the Demand Block.
Was this helpful?