
Expanding the Product Line
Follow Along
Create a New Iteration
Kathy's Best Wursts is off to a great start, but Kathy has noticed that people are asking for additional brat flavors. She's ready to expand her product offering to include cheddar brats and spicy brats in addition to the standard brat. Our first step in Process Playground is create a new iteration of our model, which was renamed to "The Early Days." We will now create a copy of the first iteration and rename it "Expanding Product Line." By creating an iteration for our model, we are able to keep the original and just factor in new changes to our process.
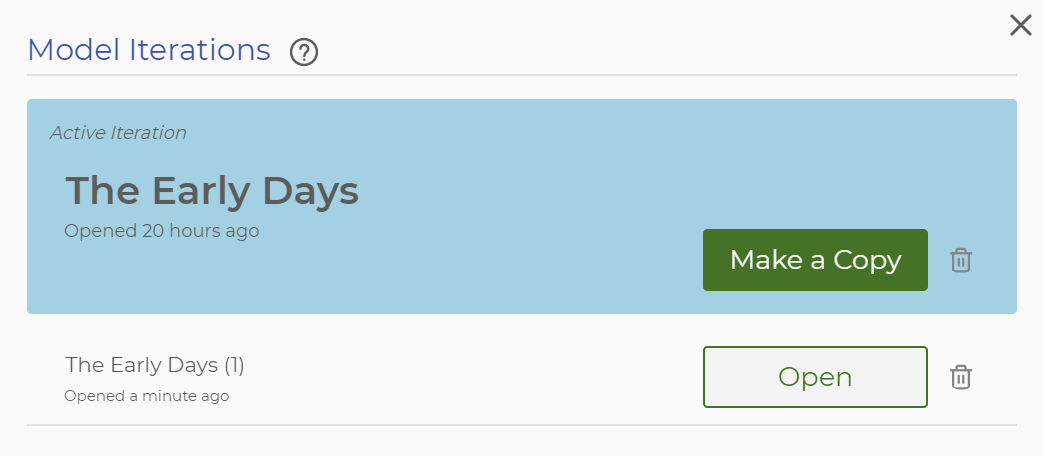
After you click on "Make a Copy" in the blue-shaded area, you'll see the copy of the model appear as "The Early Days (1)." Click on this title and rename it "Expanding Product Line", then click "Open." Double-check that you made it to the correct iteration by referencing the new title at the top of the Process Playground screen.

Modifying and Creating Item Types
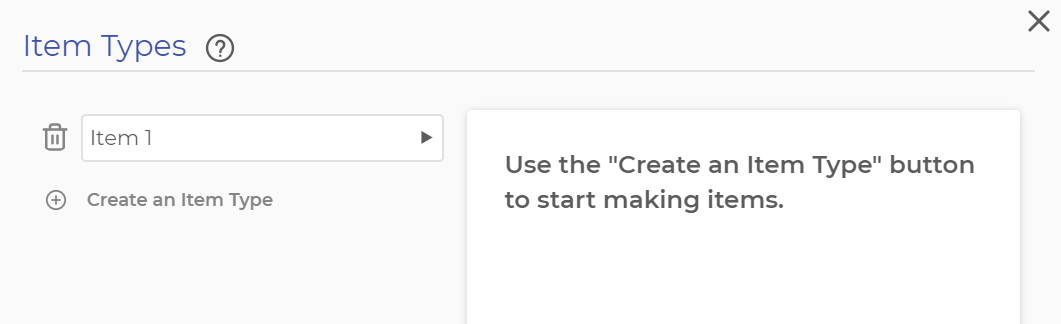
In Process Playground, we can expand the model to include these new items by using the "Item Types" dialog box, which is accessed by clicking the second icon from the left on the toolbar at the top of Process Playground.

When you first open the "Item Types" dialog box, you'll see the default Item 1 displayed, as well as the plus-sign icon for adding additional item types. The first thing we'll do is edit Item 1 to make it represent the plain brat.
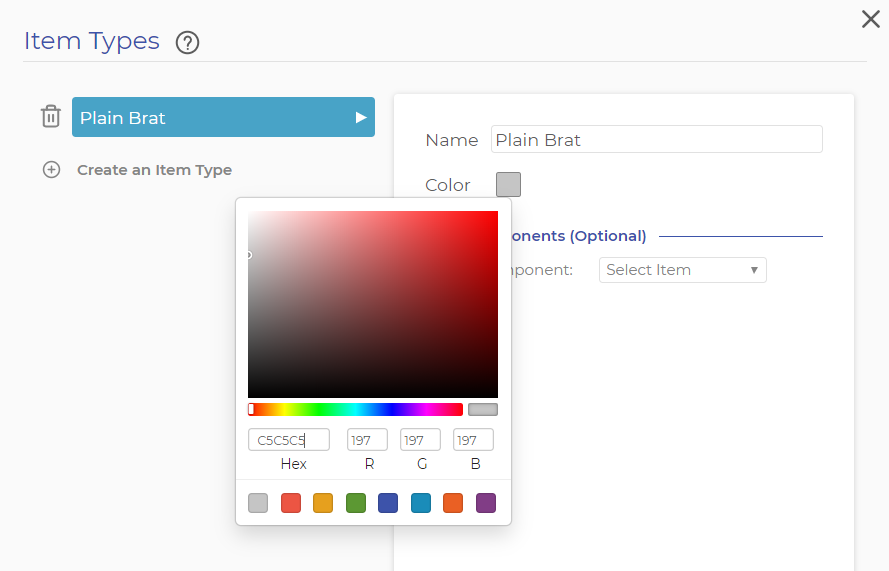
Click on Item 1 and you’ll see the right side of the window change, allowing you to rename the item to "Plain Brat." You also will be able to click on the colored box and change the color representing the item in the model. Go ahead and change the item name and make the color light grey, the typical color of a plain bratwurst. Don't worry about Item Components; that will be covered in later lessons.
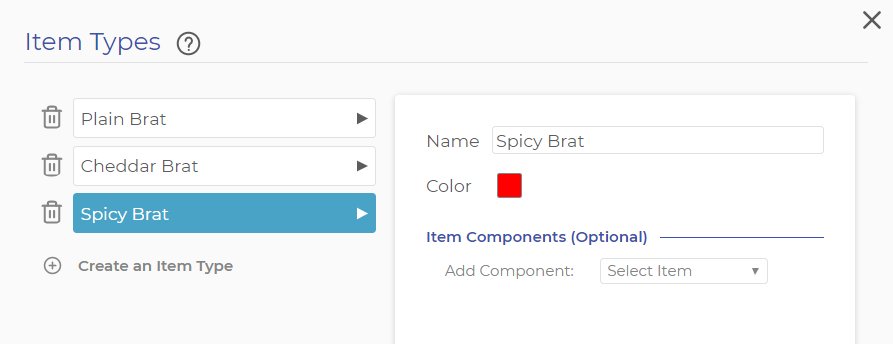
After you have completed those changes, click the plus button to the left of "Create an Item Type" and add two additional items: "Cheddar Brat" and "Spicy Brat." Choose appropriate colors to represent the items in the model.
Adding Items to Blocks
Now that you’ve added the new item types in the Item Types screen, you also must add them in each of the blocks in the model. Starting with the Demand block, double-click to open the Parameters window. The first thing you'll notice is that the default Item 1 shown in the block has been changed to "Plain Brat," reflecting the change you made in the Item Types window. In the lower right of the Parameters window, you'll see the "Add Additional Demand" drop-down menu. Go ahead and add "Cheddar Brat" and "Spicy Brat" to the block. You should end up with all three item types added to the block, as shown in the image below.
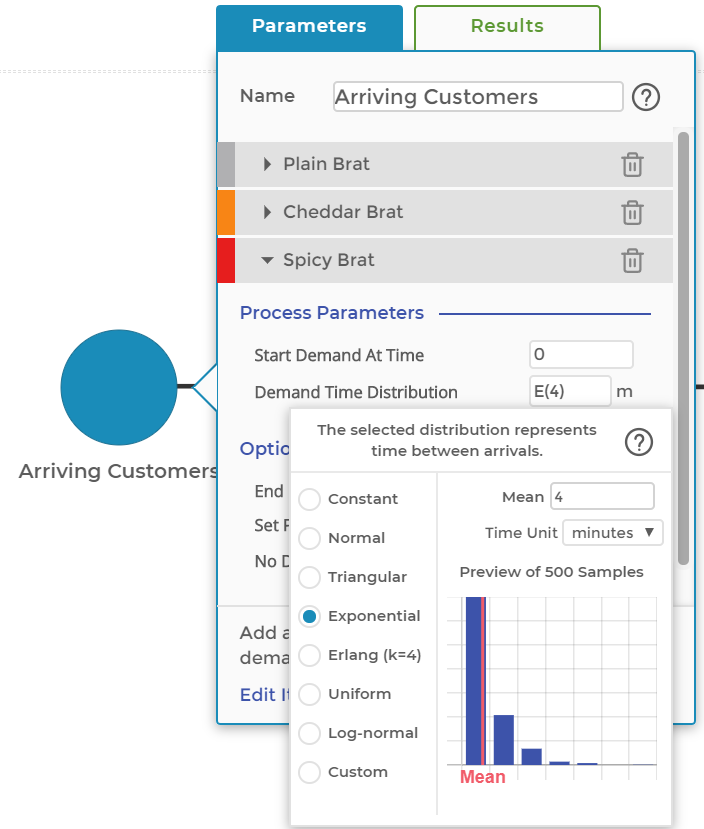
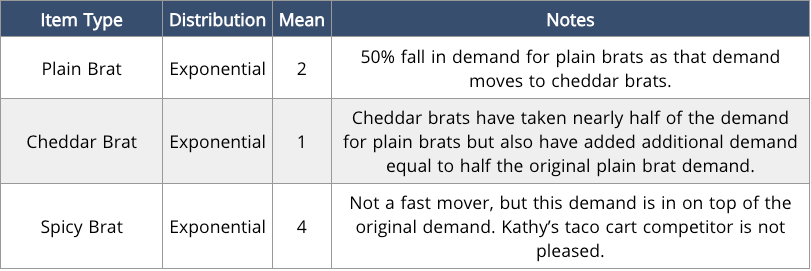
Notice that each item type had its own set of process parameters. Each of these items is completely independent of the other and can have unique processing parameters. For Kathy's Best Wursts, we'll assume the introduction of the new brat flavors will steal some of the demand for the original plain brats but also create new demand and additional sales. Enter the following parameters for the different flavor brats:
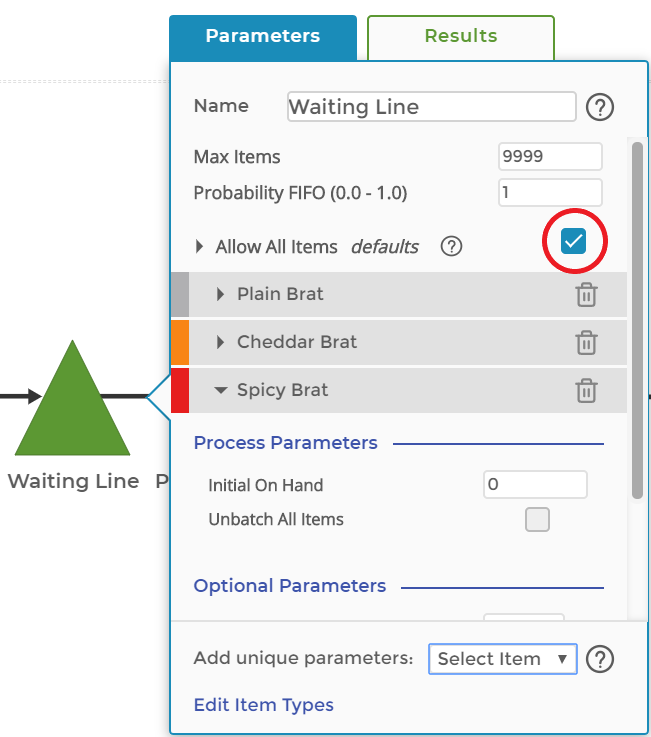
Now that you have added the three brat types to the Demand block, go ahead and add the three item types to the Queue and Exit blocks as well. There are no parameters to edit in these blocks. Adding the item types here simply will allow a user to see individual queue and exit statistics for each of the three brat flavors. You also will see the title "Allow All Items," which toggles the all-items mode. Click the checkbox to the right of "Allow All Items" to turn off this mode. For our current model, you could have left this mode turned on but it’s good practice to turn it off when you have added specific items to a queue. When all-items mode is turned on, any item type can enter the queue. When off, only the item types added to the queue can enter. This helps control the flow of your model’s item types.
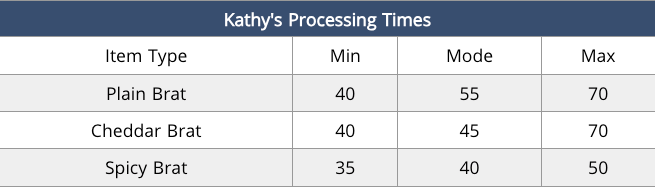
Once you have finished adding the three brat flavors to the Queue and Exit blocks, you’ll also need to add the three flavors to the Activity block. Once you have added the three flavors, you'll need to edit the Processing Time Distribution for each flavor to represent the slightly different preparation time required for each brat flavor. Use the following information for processing time:
- Plain Brat: Leave settings unchanged:
- Min = 40
- Mode = 55
- Max = 70
- Cheddar Brat: Cheddar brats don't have as many toppings, on average, as plain brats. As such, they are a little quicker to prepare. Use these parameters for the Triangular distribution:
- Min = 40
- Mode = 45
- Max = 70
- Spicy Brat: Spicy brats have even fewer toppings than a cheddar brat. They are even quicker to prepare than the cheddar brats. Use these parameters for the Triangular distribution:
- Min = 35
- Mode = 40
- Max = 50
Start a New Run
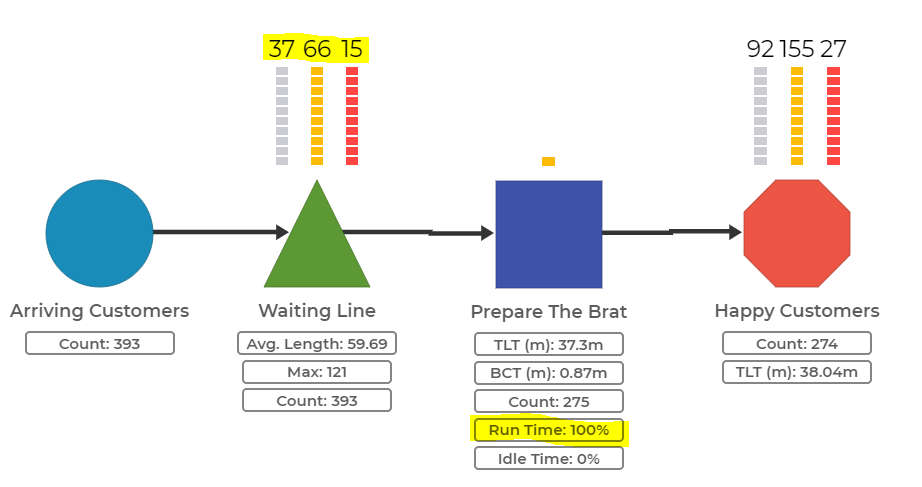
The model with the expanded product lines is now ready to run, so begin a 240-minute run. Because of the random variation in the demand and preparation times, your results will be a little different than what you see in the image below but they should be close enough. What happened? There is a huge wait for brats at the end of the run!
Look at the graph for the waiting line:
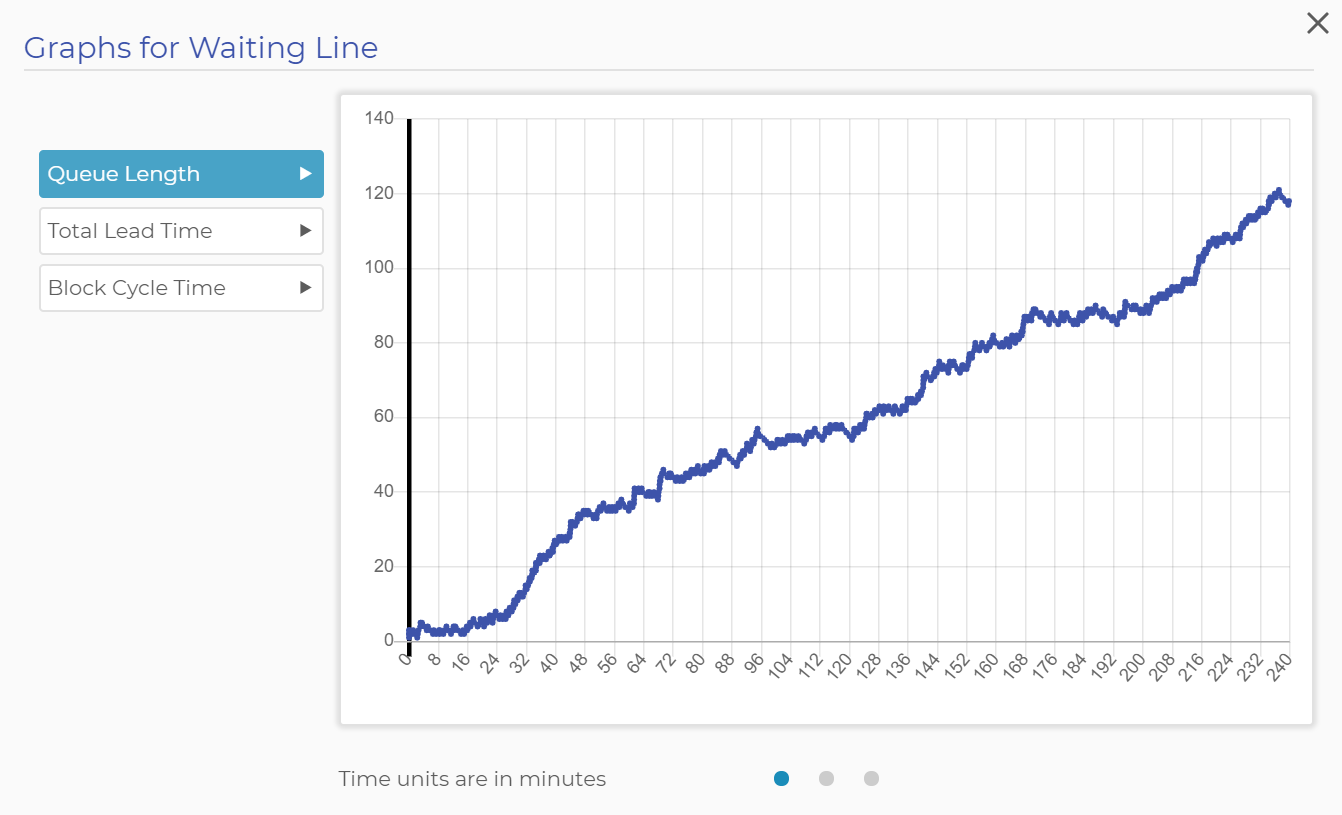
Recall that demand increased with the new flavors of brats. However, nothing about Kathy changed: She's still by herself and can't work any faster. After just one outing with the new flavors, Kathy knew she had to expand capacity to match the rise in demand. And that is the topic for the next lesson.
Was this helpful?